Bring in the New Year with a New Look
The holidays are here, and 2018 is right around the corner!
You have two choices. You can stick with your regular degular shemuglar look, or you can bring the New Year in lit with a new look and color.
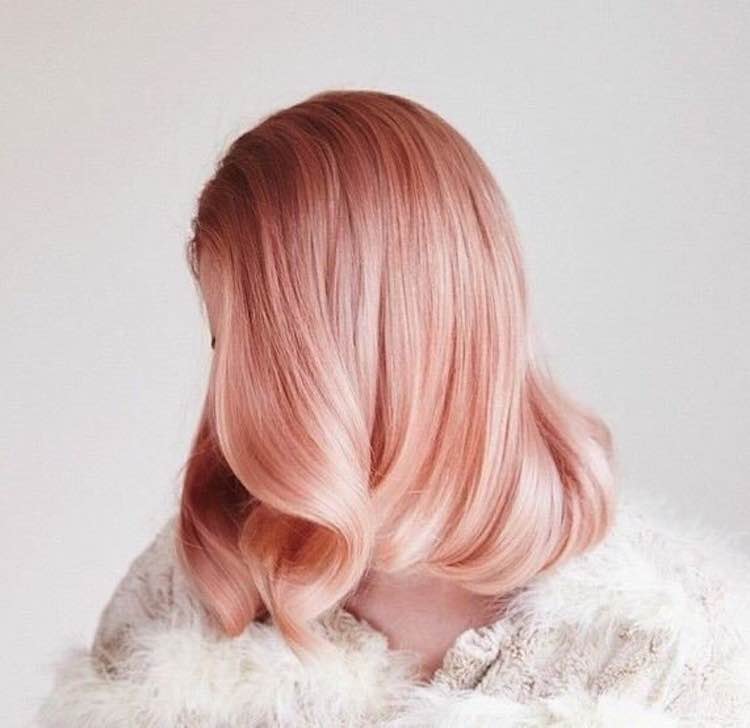
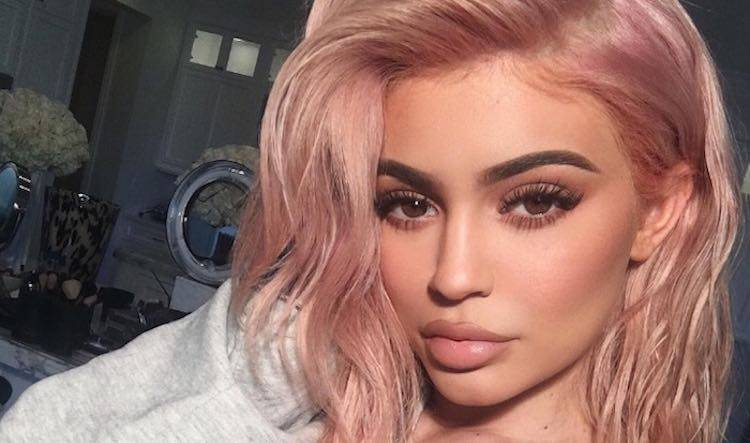
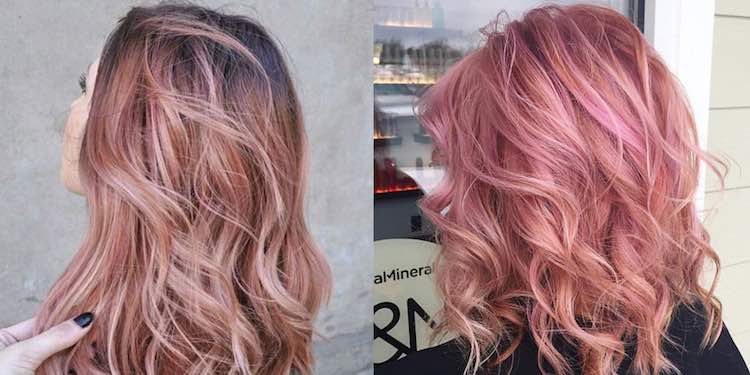
The rose gold hair color trend will work on brunettes and those with dark hair. I think it will look amazing as an ombre' look, and the color applied to natural hair will have those curls popping!
Nothing says “New Year and New Me” like rocking a new trend that is going to have you the topic of conversation every time you enter the room. Rose gold is so on-trend right now, and it’s not just about home decor. We’ve fallen in love with the color so much it's now going to color for natural hair, wigs, and hair extensions.
I know you may be a little hesitant to try it. You may be thinking “I’m gonna look crazy” or “I don’t want to get that drastic, ” but I promise you won't regret it. You know your worth, and it’s time you let the world know it too without saying a word.
Supplies You Will Need
So grab your bundles and supplies, start playing SZA real loud, and get ready to slay your hair and the New Year! The following supplies are what you will need to execute this look.
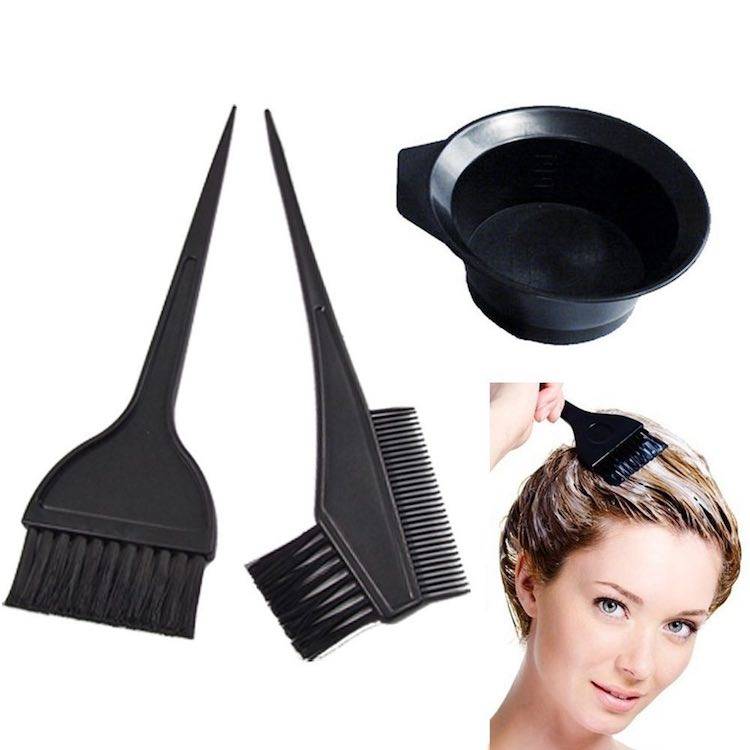
SUPPLIES
- BW2
- 40 Developer
- Protein Color Filler - Warm Brown
- (2) Ion Color Brilliance Permanent Color - Light Golden Blonde
- 10 Vol Creme Developer
- Ion Color Brilliance Gemstones - Rose Quartz
- Organix Shampoo and Conditioner
- Mixing Bowl & Brush
- Measuring Cup
- Gloves
- Foam Head
- Foam Head Stand
- T Pins
How to Color Hair Extensions Rose Gold
I suggest you create a wig using your high-quality extensions because this is a unique color and if you want to rock the look again you can pull “her” out. The best extensions to start with are platinum blonde with some root realness to them. You want your wig to look as natural as possible. But you can also bleach your extensions to get the same final result.
Use BW2 with the 40 developers to lighten the color of your hair. Make sure you leave about two to three inches of roots out. You can even ombre your extensions if you want. It’s all up to you!
Purchase your extensions and make your wig. There’s a thorough instructional blog on how to create your wig, here, on the site. Here’s when we get to the fun part but before you start to go ahead and press play on “Heartbreak on a Full Moon,” get comfortable, and get to coloring your extensions.
Attach your foam headstand to your table. Using one helps to hold your foam head and allows you to move around your unit with ease. Put your foam head on your stand. Slide your wig onto the foam head and pin it in place with your pins, so it doesn’t fall off or move while you’re working with it.
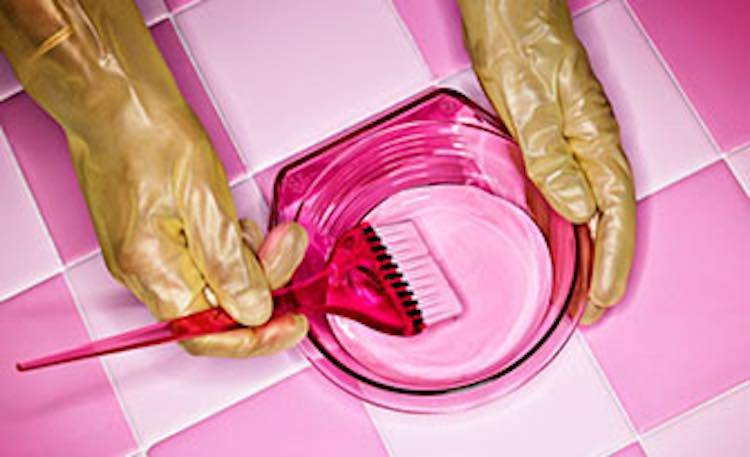
Mixing The Color
Mix a half bottle of the protein filler and the golden blonde hair color in your mixing bowl. Depending on the length of your extensions you may need two tubes of hair color. I suggest you use one and if you need more go ahead and open your second one. Save the second package because hair color always comes in handy when you’re ready to try something new!
Mix them well and apply the color to your unit. One excellent tip is to apply the color in an up and down motion to avoid noticeable lines as the color processes. You don’t want that striped look on your wig! You also want to make sure the color covers all of your hair so use a wide-toothed comb and comb through the extensions to make sure the color is on all the strands. Even if you ombre your extensions still comb through but just through the colored section of your hair.
Let the color process for about 20 minutes and then rinse it out. Make sure you rinse the hair thoroughly to remove any color, and you will know you’re good to go when the water runs clear.
Part Two of the Coloring Process
Blow-dry your hair to get it ready for part two of the coloring process. Your hair won’t be evenly colored and, in my opinion, that’s a good thing. You want to have some dimension to add more drama to the color. Don’t worry girl! You’re going to be cute!
Grab your mixing bowl and combine your light golden blonde Ion Brilliance colors with the ten developers. Again, make sure you mix it well.
Section your hair off into four sections and clip each part up with a hair clip. Starting at the back of the unit, apply the color to each section in an up and down motion. I then divide the part into two and wrap each section in foil. Wrapping the sections in foil helps the color process faster. If you don’t have foil, you can use a hooded dryer instead. If you use a hooded dryer, apply your color and clip the section up.
Let the color process for about 45 minutes to an hour but keep an eye on it to make sure it’s processing correctly. Once it’s to the color you want, rinse the color out thoroughly and dry your hair!
The Final Step
Okay! You’ve got one more step to get your wig perfect!
Mix rose quartz ion brilliance color and Organix conditioner. Make sure you mix it well. I add conditioner to my color because it makes it easier to apply to my extensions, allows me to get more of the color by diluting it with the conditioner, and it conditions the hair because after all the processing and dying it needs it!
Apply color all over hair from roots to ends and then comb through with your wide-toothed comb. You want to make sure the color covers all of your hair strands.
Don’t get upset with this last part! Let the color process on the hair for about 3-4 ½ hours. Yes! It has to stay on for that long, but the wait will be worth it!.
Ok, you’ve probably switched your music to the Xscape hits by now, and that’s cool because it’s time for us to prep this wig to wear. After the hair has processed for at least three hours, rinse the color out. Make sure you rinse it until the water runs clear. Go ahead and shampoo and condition the hair.
Blow-dry it, and now it’s ready to style!
Go ahead and put your wig on girl! You look cute, but you’re about to be flawless with one of the styles I’m sharing below. These hairstyles are perfect because they are easy to do and will work well on your wig. It’s always good to switch it up now and then.
I add the golden thread in mine, sometimes, to add just a little more sparkle and drama to my style.
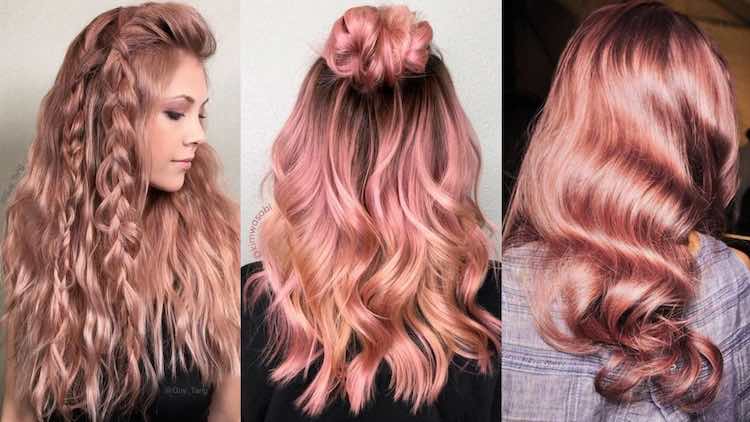
Styling Your Rose Gold Wig
Now that you have finished your rose gold wig lets go over a few ways you can spice it up. There are so many ways to style your wig, here are a few:Halo Braid
To get started with this style comb your hair to remove tangles. Create a center part and start braiding one side of your hair from the center part around the perimeter of your head. Make sure you are pulling your wig forward as you braid the hair. Now, some people leave a little leave-out to braid in with the hair extensions which are an option for you.
Your initial pattern for your braid should be small and tight, but as you continue braiding around the head, you want to make it a little looser.
Pay close attention to this critical step!
As you get to the other side of your head, you want to start back braiding smaller because you want the size of the braid to look the same on both sides. Also, the hair on your wig should be laying straight down in front of your face to give your continuous braid a smooth look. Just think about it as if you comb all of your hair down around your head in like a mushroom.
Remember, the braid needs to be tighter (just like the beginning of the other side) and smaller once you get back to the front of the head.
After you finish braiding the hair, pin it down with a few bobby pins. To get the braid looking just how you want it to loosen the braid. Make sure you don’t forget to sleek those edges!
Rose Gold Dutch Crown Braid
Start off by parting your wig from ear to ear.
I suggest you pull back your hair to keep the back section out of the way as you braid the top. Comb your hair where it lays straight down in the front. Start braiding your hair (wig) from the right ear and across the top of your head.
Make sure you are pulling your wig forward as you braid.
If you do have leave-out, braid it in with your wig. Continue your braid to the other ear. I like to put a rubber band at the end portion of my braid, but you can just pin it in place.
Now, you can style the rest of your hair however you want. The rose gold hair color will pop with this style.
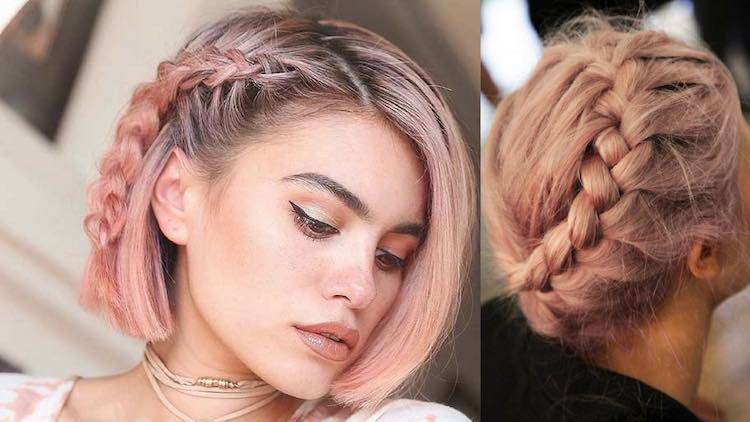
Rose Gold Cornrows
This style is straightforward. Part your wig down the middle. Start braid one side first. Make sure the pull the wig forward as you braid. Braid one cornrow all the way down to the end.
Go ahead and do the same thing on the other side. Add some cute adornments/clips, and you are ready!!!
Okay, ladies! You are ready to slay the holidays and 2018! Not only are you going to be rocking one of the hottest color trends but you’ll also be looking flawless while you do it!
Make sure to share your selfies and tag @privatelabel on Instagram to let us celebrate you as well! We know you’ll be looking like the Queen you are!