
U-Part Wig Making 101
If you are considering leaping into the wig game the perfect transition style is the U-Part wig.
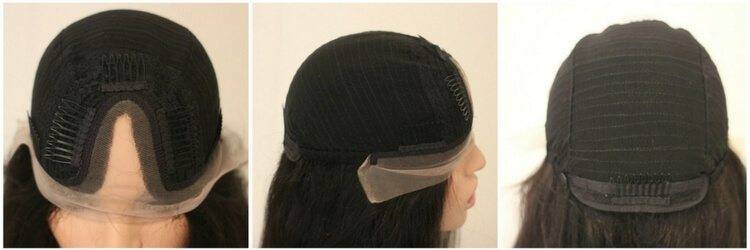
It is like the cross between a partial sew-in and a lace wig. With more effort needed than the former and less effort required than the latter, a U-part wig is essentially a wig with a small hole at the top or side of the wig in the shape of a U.
The hole enables you to blend and manipulate your leave out over the top of your wig or attach a closure, leaving you with a hairstyle that looks as if it is growing out of your scalp!
The U-part wig doubles as a protective style because the majority of your hair is braided and concealed underneath the wig which can give you the same effect as a partial sew-in. However, the most significant difference between the partial sew-in and the U-part wig is that you have complete access to your hair.
This also means that you do not need to have tight braids with a lot of tension on your edges because you can take the wig on and off every night.
Note: If you have thinning hair or you are experiencing a bald spot at the top of your head, this style may not be for you because it will be difficult to cover the top of the wig.
Tools to Make a U-Part Wig
You can purchase U-Part wigs at the beauty supply store in an aisle near your favorite brand of packaged hair; however, these pre-made options are tough to customize.
With the pre-made wigs you cannot determine how big the hole is for your leave out nor can you change your mind if you get home and want a left side part instead of a center part.
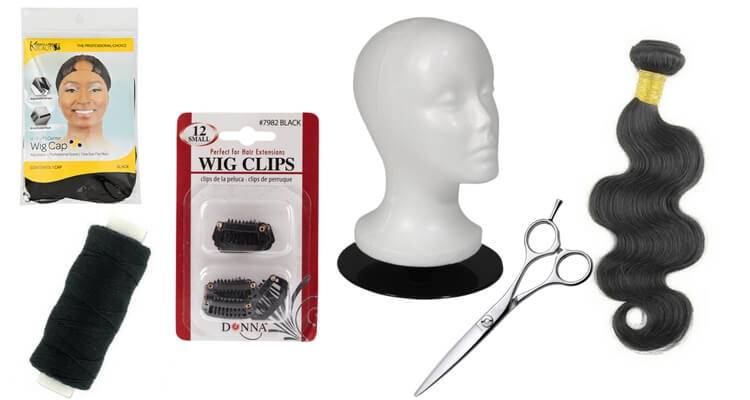
With these reasons in mind, you can make a fabulous U-part wig at home using the steps and the tools below:
- Wig Cap or U-Part Wig Cap
- Foam Head
- 2 to 3 Bundles of Private Label Extensions depending on your preferred density.
- Wig Clips
- Hair Needle and Thread
- Scissors
- Pins (optional)
- Glue Gun & Hot Glue Sticks (Depending on the method)
- Hair Glue & Blow Dryer (Depending on the method)
- Hair Weave
Note: Similar to the pre-made U-part wig; a U-Part wig cap can be hard to customize when making your U-part wig. Keep this in mind when selecting the wig cap that you want to use for your wig.
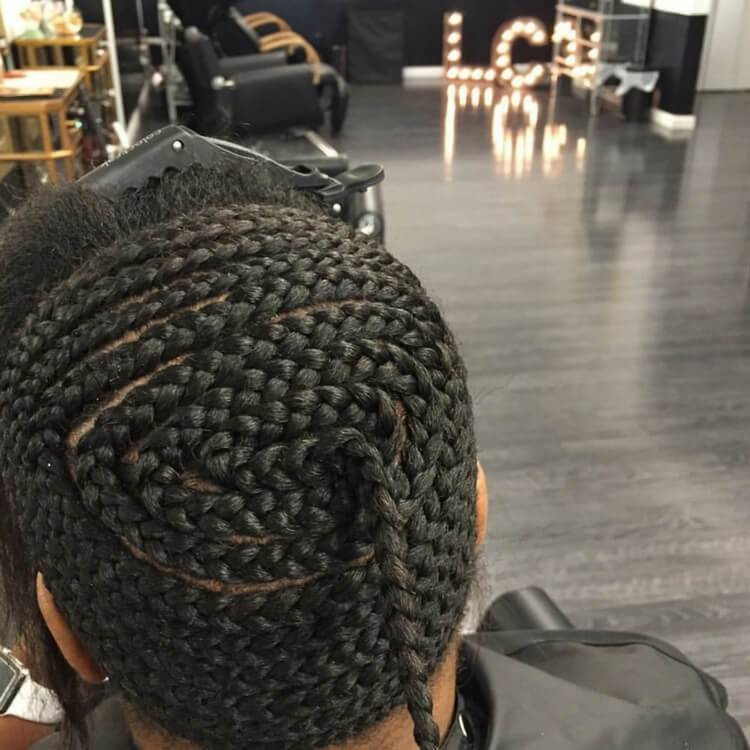
Step One: Braiding Pattern
First up, the braids. Just like a sew-in, the key to a U-Part laying flat and slaying your look as a whole is the braiding pattern.
Be sure to braid two anchor braids along the perimeter of your U-Part whole so that you have a distinct place to secure your wig clips. (Feel free to braid your leave out and edges so that the hair is out of the way. Be sure you leave out enough hair to protect the perimeter of your U-part).
Braid the rest of your hair to the back and pin-up your hang-time.
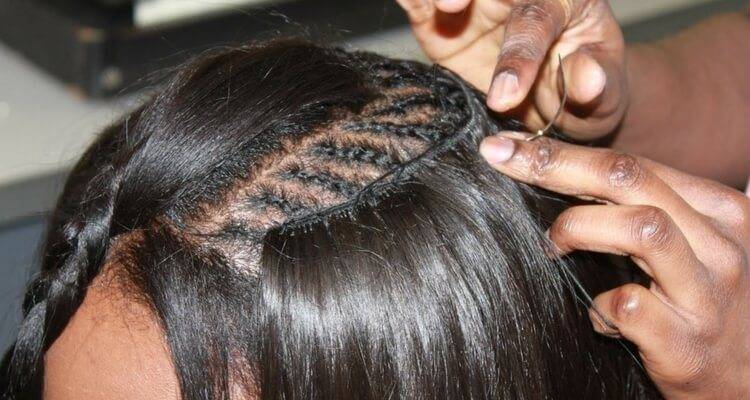
Step Two: Sew-On the Hair
Depending on the method you choose: 1) Sewing on your tracks or 2) Gluing on your tracks, this next step can take more or less time to complete your wig. I would sew on the hair if I plan on using the hair again for a later style.
Glue is too messy to remove and reuse, but cutting threads will make it so much easier for me to remove the hair and use it for another sew-in or wig style.
Steps to Making Your U-Part Wig
- If using a wig cap that is not pre-cut, first start off using a ruler to measure the length of your leave out.
- Place your wig cap on your foam head and pin it down.
- Mark your wig cap with the same measurements of your leave out.
- Begin to sew on the hair from the very edge of the wig cap. Sew the thick black thread first through the wig cap, then through the weft of the weave, and continue to do this as you are adding hair to the cap. As you sew each track on the wig cap, layer by layer be sure to sew the tracks in a U shape.
- At the edge of the wig cap, loop the thread around the needle twice and create a knot to secure the track on the border of the wig cap. You can sew larger stitches spaced farther apart when securing the hair onto the middle and bottom of the wig cap because while the tracks need to be attached, they will not be seen and will require little to no manipulation while on your head.
- At the top of your wig cap be sure to stop sewing the tracks at the marks on your cap. These stitches should be smaller and closer together because you will manipulate this part of the wig frequently when adjusting your leave out.
- Cut and remove the excess part of the U-part portion of the wig. Do not cut too close to the top tracks. (Avoid cutting any threads so that you don’t detach the tracks at the top of the wig cap and around the opening of the U-part.)
Step Three: Adding Wig Clips
Place one clip on each side of the U-part and add two to three around the back border of the cap.
Sew the clips down and loop the thread through the cap and the hole of the wig clip twice. Secure the clip with a knot.
If you are in a time crunch, you can use glue and still use the same steps to create a U-part wig.
- Braid your hair down.
- Measure your leave out.
- Mark your wig cap.
- Glue your tracks down from the bottom up using either a hot glue gun or weave glue and a blow dryer to secure the hair to your cap.
- Cut the excess fabric creating the U-part.
- Secure your wig clips.
Note: If you have a Latex allergy or sensitivity to glue then this method can adversely affect your scalp, so you may want to reconsider gluing on your tracks.
U-Part Wig Making Tips!
Whether gluing or sewing the tracks down to your cap, try the fold-over method.
Instead of cutting the weft of the track when you get to the border of your wig cap, fold the track over and secure it to the wig cap. This process may take a little longer, but this will decrease shedding.
When opting to create your U-part wig, you can customize your look and create a hairstyle that only you can pull off!
If you have experience in making a U-Part wig and have any tips that may make the process a little easier, leave a comment below and share the goods!
