Make Your Hair Extensions The Best They Can Be
For decades, hair extensions have given women the freedom to go from cute and settle, to fierce and sexy, within minutes.
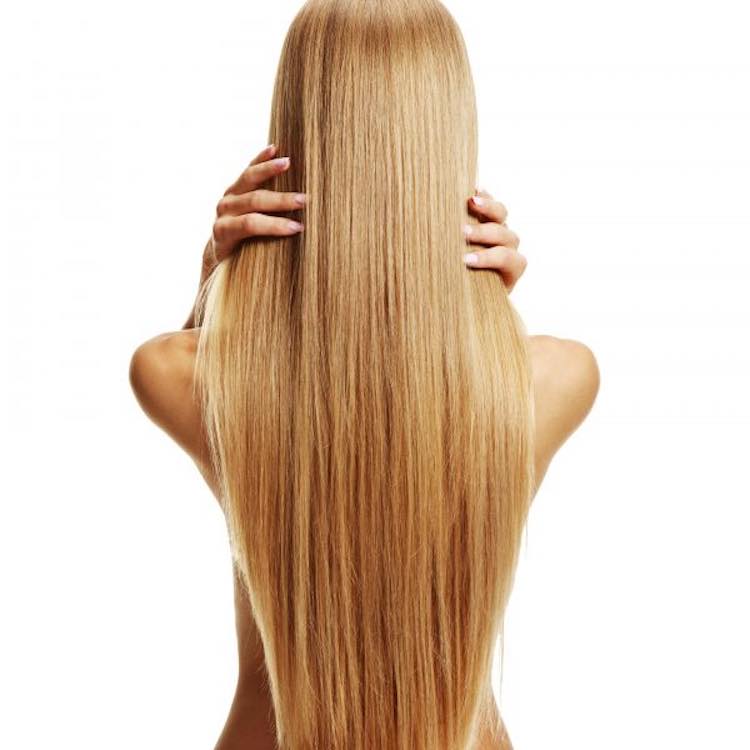
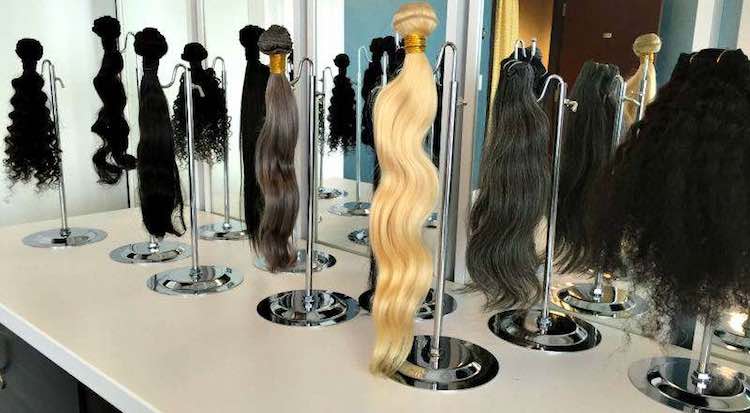
Hair extensions are a staple for women and for some of us they are like our “right-hand gals.” There just when we need them, they’re guaranteed to have our backs and give us all the flare and stare we need. Hair extensions are like your BFF. Whether your BFF is big and curly or silky and straight, it is important to treat her with proper care to maintain the relationship.
Hair Extension Hacks
Before throwing away hundreds of dollars worth of hair, check out these ten hacks that will aid in extending the lifespan of your extensions.
1) Initial Wash
After purchasing your extensions, be sure to shampoo and condition them. Some may be skeptical or terrified about washing their weave but, it is a must. If you've spent hundreds, even thousands of dollars, why wouldn’t you go the extra mile to ensure proper maintenance?
Shampooing removes any dirt, chemicals, or even critters that may have slipped into the packaging. It also reveals the hair's natural curl or wave pattern. For the sake of prolonging lifespan, I would not recommend shampooing human hair blends such as Milky Way or Outre, or synthetic hair as it may become matted and unwearable.
To wash your virgin hair extensions follow these steps:
- Begin by smoothing out the hair using a weave brush. Be sure to start with the roots and work your way to the tips using gentle strokes.
- Wet hair with cold water and gently add shampoo. If you are uncomfortable with using sulfate-based products, there are sulfate-free options such as As I Am Naturally Curl Clarity Shampoo or Shea Moisture Coconut & Hibiscus Conditioning Cleanser. I recommend using Herbal Essence Hello Hydration or Organix Brazilian Keratin Therapy shampoo. Never harshly scrunch or ruffle the hair together, gently massage the shampoo in from root to tip.
- After the shampoo is in, evenly distribute the product throughout hair and then rinse with cold water.
- Add conditioner from root to tip give hair lux and moisture. I recommend using Organix Brazilian Keratin Therapy conditioner or OGX Renewing Argan Oil of Morocco conditioner. Allow the product to sit for 15-20 minutes.
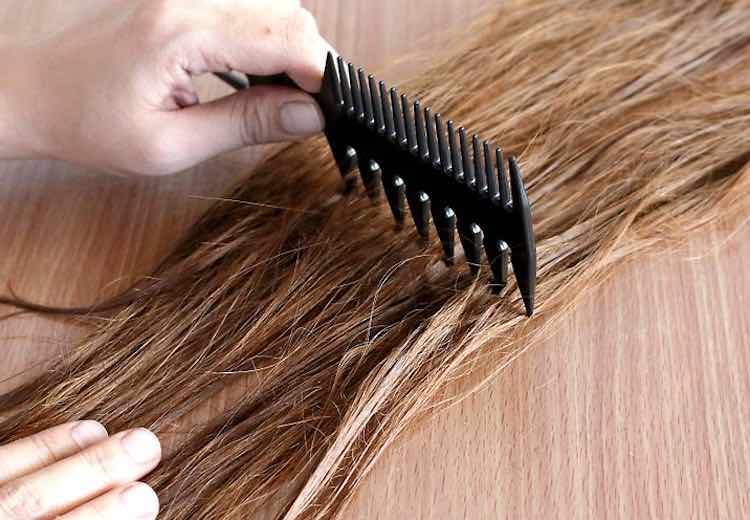
- If necessary, use a wide-tooth comb to gently detangle from tip to root and then rinse with cold water.
- Pat dry with a towel and then allow hair to air dry for the remaining time. Be sure to include this step if you want to maximize your hair’s life.

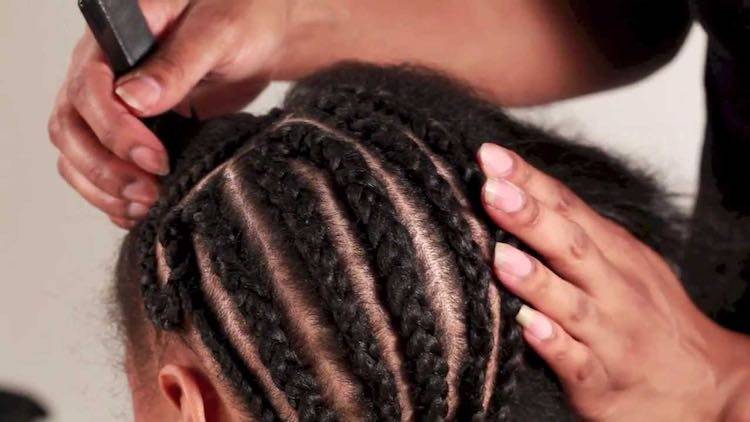
2. Ensure Proper Installation
Ensuring your extensions are correctly installed is the foundation for maintaining its lifespan.
Whether you plan to get a sew-in, glue-in, tape-in, or custom-made clip-ins, it is imperative that you have it installed correctly. If you are a beginner to the world of hair extensions, I recommend scheduling a consultation from a professional hair stylist. Once you both have decided on the best install type for you, book your professional stylist to install your extensions.
Yes, it may be cheaper to go to your cousin or neighbor across the street, but it's not worth the potential chaos. Allowing the wrong person to perform your install can cause excessive shedding, tangling, matting, or color damage.
Booking a professional stylist eliminates these happenings and ensures that your hair is in excellent, trustworthy hands. This is by no means to say that one who isn’t a professional stylist cannot do hair, my point is that booking a professional stylist gives you the security that your hair is in good hands.
Various Hair Install Methods
There are various forms of installing your hair and choosing the right one will give your hair extra longevity.
If you are planning to wear your hair for an extended period, I suggest a sew-in or custom wig unit. Unlike glue-ins, these options require less maintenance and minimum cutting of the wefts. Wefts are the material that hair stitched on. Sew-ins are quick and easy and usually requires low maintenance after installation.
If you’re looking for an option that requires even less care, custom wigs are the best. Unlike sew-ins, wigs afford you with the flexibility to add or remove your extensions whenever you want. There are various ways to customize your unit such as sewing or using the hot glue gun method. Both work great and require minimum cutting of the wefts.
Other options include glue-ins, which require cutting hair wefts and applying bonding glue to install or clip-ins which are customized clips of hair.
Whichever installation method you pick, be sure that it is one that will aid in maintaining the longevity of your hair.
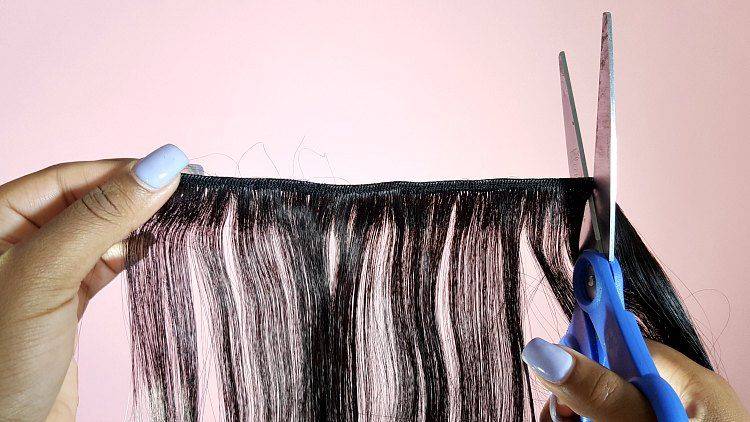
3. Seal the Wefts
To prevent excessive shedding, I recommend sealing the wefts of your extensions.
While a few strands may shed here and there, sealing your wefts stops shedding up to 50%. Before installation, request that your stylist seal your wefts. If you’re unable to, sealing wefts are simple and easy for anyone to do.
The first step is to lay tracks on a newspaper or old towel that you don’t need. Be sure that it is positioned on a flat surface such as a countertop or table. I recommend using a sealant that comes with a nozzle as it is much easier to apply.
Starting on one end, apply a sealant to stitch off the weft and work your way to the other end. Wear gloves and avoid getting the product on the hair itself as it will make it clumpy. If possible, seek help to make things easier and less messy.
If you want hair that is guaranteed to shed less, be sure to follow this hack!
4. Wash Your Extensions Regularly
As you wear your weave more often, it is a must that you wash it regularly just as you would with your natural hair.
Doing so prevents the formation of dry, brittle, or smelly hair. Depending on the frequency of wear, products used, daily activity, and environmental aspects (i.e., exposure to sun, snow, or rain), you may choose to wash it weekly, bi-weekly, or a few days out of the month.
If you wear your weave on a regular basis and engage in daily activities such as work, school, shopping, or exercise, I recommend washing your extensions at least bi-weekly as it will help to keep it moisturized, bouncy, and full of life.
Unlike the initial wash, it is not necessary to shampoo your weave regularly. Instead, you may co-wash. Co-washing is merely using conditioner only to wash your hair instead of shampoo. As mentioned earlier, sulfate-based shampoo completely strips the hair from any dirt, oils, or chemicals. While this may be good for the initial wash, it is not necessary if you will be washing your hair frequently as it removes oils and moisture. Limit the use of sulfate-based shampoo to once every other month or bi-monthly.
If you are wearing a sew-in, it is best to follow these steps while in the shower. If you are washing a custom unit or clip-ins, fill a spray bottle with cold water and spray extensions until thoroughly wet.
- Apply conditioner with fingers from root to tip. Gently work in conditioner and never harshly rub hair together as it may become matted or tangled.
- Use a wide-tooth comb to detangle any matted or tangled hair from root to tip.
- Allow the product to sit for 15-20 minutes.
- Rinse with cold water.
- Pat dry with a towel and then allow hair to air dry.
If you want bouncy and moisturized hair, be sure to follow this step!
5. Air Dry Extensions
If you want to retain moisture, softness, and shine, be sure to air dry your extensions. Air drying is the process of drying the hair without using heated air. Before you run to the blow-dryer, read these simple heatless ways on how to dry your hair.
The first method is using natural air. After washing hair extensions, clip them onto a hanger and allow them to naturally dry. You may want to hang your custom wig unit on a wig stand and let it dry.
For sew-ins, be sure to heat dry your natural roots to prevent mildew or foul smell and then allow extensions to air dry. Feel free to run errands, watch your favorite movie, or catch up on homework as your hair is drying. Once hair is dry, run a wig brush or wide tooth comb through it to ensure that it is smooth and tangle-free.
The second method is using cold air with a blow or hairdryer. While it may require a little extra time and work, it is a lot better than using heated air. After washing the clip or tape-ins, merely snap them onto a hanger and hang them up. Use your blow dryer of choice and set the temperature to cool. For faster drying, set the speed to high. You may want to hang your custom wig unit on a wig stand and follow these steps. As mentioned in the first method, for sew-ins, be sure to heat dry your natural roots to prevent mildew or foul smell.
Use the blow dryer with the setting on cool to dry your hair. Smooth your fingers through the hair to ensure that there are no tangles.
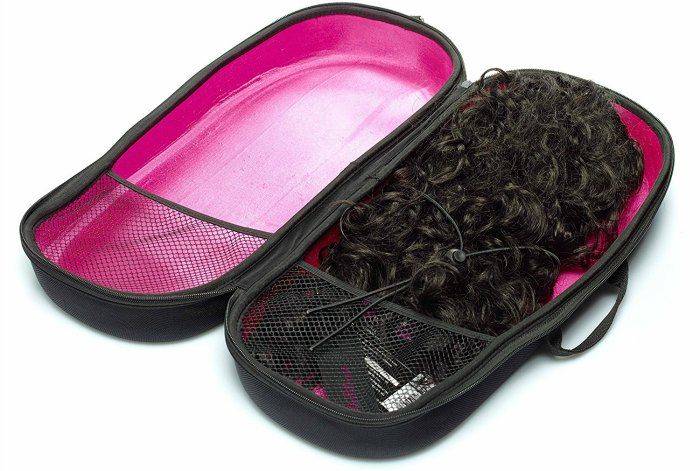
6. Proper Hair Extension Storage
To maintain cleanliness, be sure to store your hair correctly. This hack is for those with leftover uninstalled hair, clip-ins, tape-ins, or even custom-made units.
Before storing extensions, be sure that they are washed to discard any product build-up and air-dried. There are various ways to save your weave.
The first way is using an airtight container as it maintains cleanliness, dryness, and safety. Use a container that is spacious enough to store all of the hair. To save extensions, start by rolling the wefts tightly together in a circular motion. Continue to do this until wefts have formed a circular pattern. You may use a hair clip or scrunch to maintain the format of hair.
Next, carefully place them in the airtight container and store them in a dry place away from light. Putting them on a shelf, in a closet, or on a dresser is ideal. Store your custom wig in an extra-large container.
The second way is using airtight Ziploc bags. Be sure to use bags that are spacious enough to store all the hair. Airtight Ziploc bags keep off germs and ensure safety. Repeat the same steps mentioned in method one. Store your custom wig in an extra-large Ziploc bag.
If you want to protect your extensions, be sure to follow this hack!
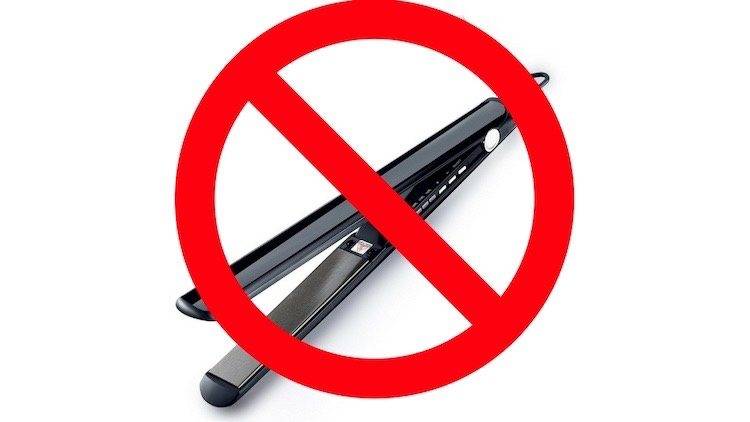
7. Use Minimal Heat
Whether you want gorgeous beach curls or bone straight hair, there are ways to achieve these styles using little to no heat. Using minimal heat prevents brittleness and heat damage.
If you want silky bone straight hair, there are ways to achieve it without compromising the lusciousness of your beautiful hair. For best results, wash, and air dry hair. Start by sectioning your hair into 4-6 equal parts. Next, apply your favorite heat serum or protectant to each section as it will help to protect the hair from heat damage and dryness.
I recommend using CHI Iron Guard Thermal Protection Spray or Cantu Shea Butter Thermal Shield Heat Protectant. For maximum results, I suggest trying the chase method. You will need a pintail comb and a clip. Set your flat iron to 375 degrees. Take a piece of hair from the sections that are portioned off. Run the flat iron midway through part of the hair.
Next, place the pintail comb beneath the flat iron and use it to “chase” the hair as you flat iron it once more. To limit heat, repeat these steps once for each section throughout your hair. Spray oil sheen for extra shine and bounce.
If you’re looking for more fun and flirty look, curls for the girls are perfect. Check out these steps on how to achieve overnight heatless curls. First, washed and air dry hair.
Separate your hair into 4-6 sections. To form curls, you will be using Flexi-rods. Take a piece of hair from one of the portioned parts and add Flexi-rod. Next, twirl Flexi-rod in an upward motion until hair has completely covered it. Repeat these steps until the entire head is in Flexi rods.
To protect your extensions from heat damage, be sure to follow this hack!
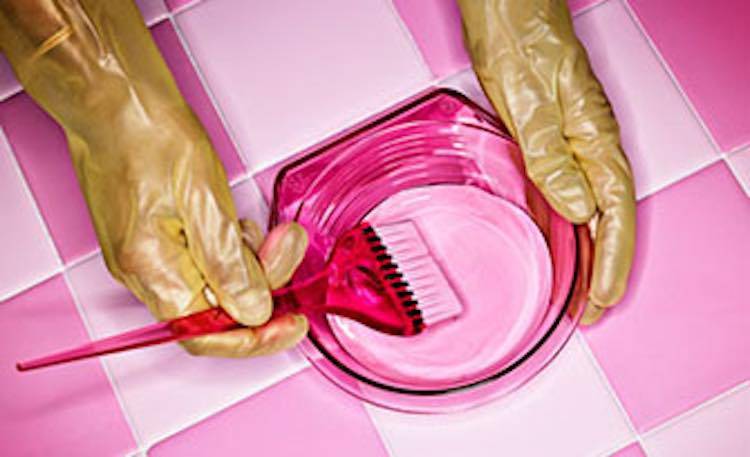
8. Minimize bleaching
I know! We all love colored hair.
However, if you want to preserve the lifespan of your hair, it is crucial to minimize bleaching. If you can’t resist bleaching your hair, set an appointment with a professional stylist. Limit hair bleaching to once as it may dry out and damage the original texture of the hair. There are also other methods of coloring hair such as temporary hair spray or bleach-free dye.
There are a ton of temporary hairsprays colors that you can play around with such as blonde, pink, dark red, and silver. The beautiful thing about temporary hairspray is that it is cost-effective, quick, and easy enough for anyone to do. It affords you the versatility to try streaks or a bomb ombre look.
To apply temporary hairspray to your extensions, simply hold the bottle about 8 inches away from your hair and distribute it according to your preference. Go from blonde to brunette in no time!
If you are looking for something longer-lasting, bleach-free dyes are great. I recommend going to a professional hairstylist for this option.
9. Use a Wig Stand for Styling
If you are a wig lover like myself, I’m sure you enjoy the versatility that wearing wigs give.
With wigs, you can switch from long to straight in the blink of the eye. With so much room for creativity and switching styles, it is imperative that you strive to maintain its shape and uniformity. To preserve your wig for a longer time, I recommend using a wig stand for styling. Wig stands to aid in retaining the wig’s shape and prevents excessive tugging or pulling on the wig.
If you want to maintain your wig’s shape, even more, try styling your wig on a dummy head as it mimics the shape of your actual head. Both methods work efficiently and help in maintaining the lifespan of your wig.
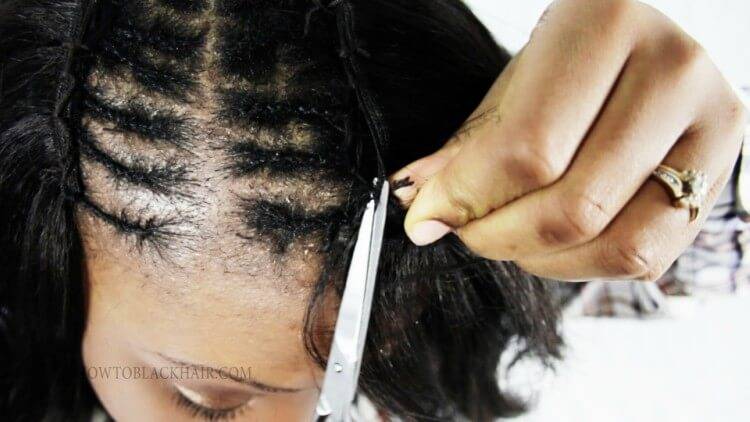
10. Properly Remove Extensions
The final hack is to ensure that you properly remove your extensions.
Not only does this protect the lifespan of your extensions, but of your natural hair as well. To take down your sew-in or glue-in, I would highly recommend going to a professional stylist as they are skilled in the proper procedure.
While it may seem simple, one wrong step in taking down your hair can lead to utter destruction. Do not risk cutting your wefts or natural hair, seek a professional!
So, those are my top ten hacks for preserving your extensions. Cheers to longer-lasting weave! Do you have any hair secrets you’d like us to know? Leave them in comments and share your favorite hack!
